This post contains affiliate links. To learn more, hop over to our Disclosure page.
I wasn’t always good at makeup. Oh, no.
We’re having a bit of fun today, as I jokingly (sort of, more on that in a bit,) walk you through my middle school makeup tutorial.
Of course, I’d love for you to have a laugh at my expense. Because seriously, I deserve it when I think about what I thought made for a good look.
But all jokes aside, I want this to be beneficial to you. I want you to take from my mistakes, so you look better from the get go than I did for the first seven years of my makeup wearing career!
So enjoy the little middle school makeup tutorial, and then have a look at my step-by-step and product-by-product breakdown of everything I did wrong. Trust me, it’s a lot, but I think it’ll be super helpful for people just starting out with makeup who’d like to bypass the rookie mistakes and catapult themselves straight to flawless-town.
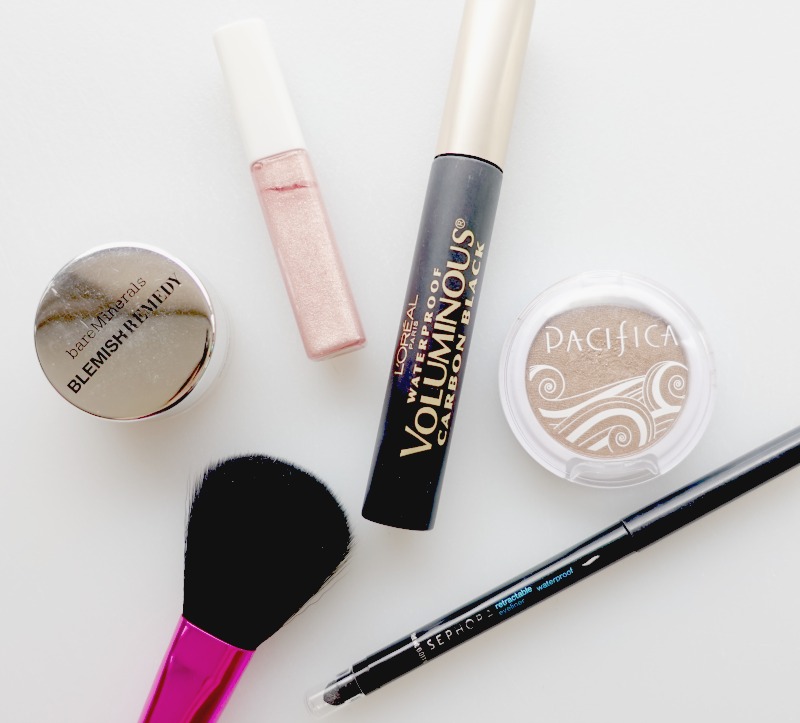
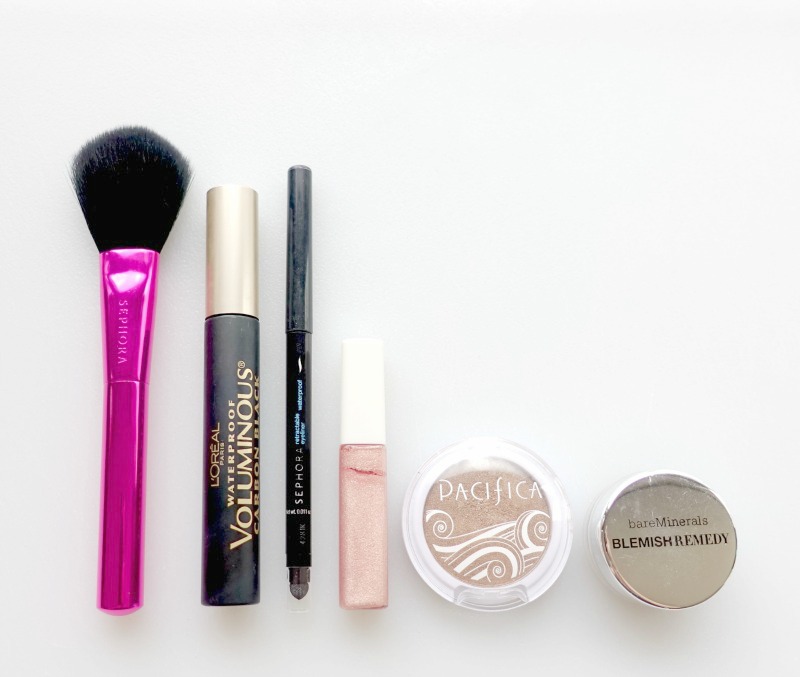
Keep your eyes peeled throughout the post! I’ve inserted a bunch of my now-favorite products that I wish somebody would have introduced me to back then.
You may want to get a cup of coffee and a snack for this one. It’s about to get real.

Kay’s Middle School Makeup Tutorial
It’s quite simple, actually.
Step 1: Haphazardly dust a powder mineral foundation all over the face.
Step 2: Smudge some gold eyeshadow on the lids. Use whatever brush, or your fingers. It totally doesn’t matter. *Insert clueless smile*
Step 3: Line your eyes with the blackest black liner you can find. Lay it on thick; you want those peepers to stand out strong.
Step 4: Pile on waterproof mascara. It doesn’t matter if you’re not going to the pool. Waterproof is better. *Nods enthusiastically*
Step 5: Finish off with a shimmery, glittery lip gloss with basically no color. You want those undefined lips shining bright like a diamond!
And that’s it. I told you it’s easy.
Now, I’m sure you have a few inklings as to what’s weird about this tutorial. Let’s break it down.
Skipping primer means an uneven (and oily & flaky) canvas
As you may have noticed, I use no primers anywhere in my middle school makeup tutorial. Not for the face, and not for the eyes. And then I wondered why I had staying power problems.
Though it seems just like another time consuming step, using primers can make or break the look in certain situations.
In this case, I had some flakiness around my mouth, plus I just naturally have super oily eyelids. Using a silicone primer just around my flaky areas evens out the skin texture and provides a smoother surface for foundation to adhere to. Foundation applied on uneven skin looks patchy, as the foundation reacts differently to each texture.
Primers exist for basically every kind of skin issue you can imagine. Chances are, you need at least one of them.
I don’t know exactly how long my eyeshadow managed to hang on back then, but I am quite sure it gave up and ran away long before the day ended.
Using an eyeshadow primer includes all the same benefits as face primer, and then some. It smooths your eyelid surface making for a smoother, more even eyeshadow application. It gives your powder shadow something to grab onto so it doesn’t blow away during the day. Then, it kicks oil to the curb so it can’t disturb your expertly applied eyeshadow.
Primers- use them!
Don’t be like 8th grade me- Use this! >> Laura Mercier Foundation Primer
Not sure what primers you need or how to use them? I’ve got a post for you! Right this way >> The Ultimate Beginners’ Guide to Makeup Primer
Concealer was just not a thing, apparently
You also may have noticed that concealer is no where to be found in this look. That’s no accident- I really just didn’t wear concealer.
My under eyes circles actually look better these days than they did back then. (I had a notoriously bad time in middle/high school, so the circles were on point back then.)
Even if you don’t have bad dark circles, concealer helps to erase naturally occurring shadows that make us look tired, plus it helps highlight the areas we want to bring forward.
Obviously, there are a few sections where I could use a bit of extra coverage. Concealer fixes that too.
Concealer is great for so many things; pick a good one and you won’t regret it.
Don’t be like 8th grade me- Use this! >> Urban Decay Naked Skin Concealer
Want to know more about how to use concealers the right way? I give you the complete run-down in this epic post >> How To Choose the Best Concealer for You
No definition without blush, bronzer, or highlighter
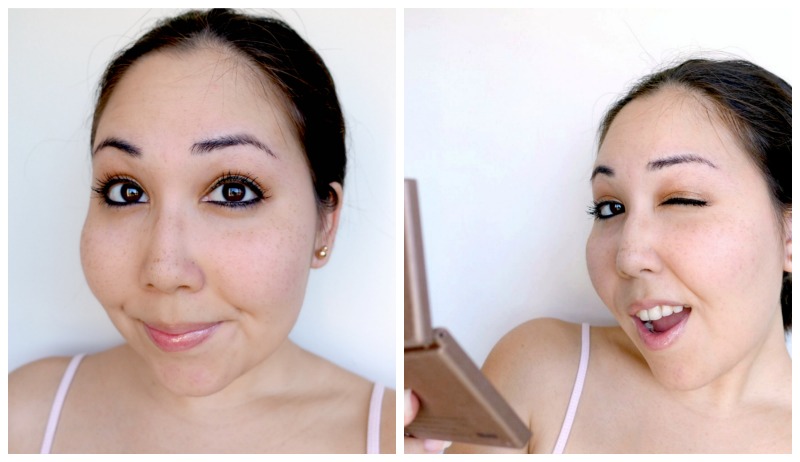
I don’t know what is worse about this middle school makeup tutorial- my badly applied eye makeup, (which we’ll get to,) or my terrible lack of facial definition.
I think I believed that my cheeks were already so big, that blush would only make them stand out more, so I didn’t want to wear it. Come to think go it, I don’t even remember if I knew bronzer and highlighter existed.
Foundation evens out your skin tone, which is what we want. But in doing that, it erases all natural shadows and variations in color that give our faces a three-dimensional look.
So yes, young Kay, blush (and bronzer, at least) are quite necessary.
Of course, how much of these products you apply is up to you. You don’t have to go ham with color in order to achieve the subtle definition that makes you look like a living person, and not like a plaster bust of yourself.
Don’t be like 8th grade me- Use these!
NYC Smooth Skin Bronzer in Sunny >> Purchase on Amazon
Clinique Cheek Pop Blush in Berry Pop >> Purchase at Sephora
Hourglass Ambient Strobe Lighting Powder >> Purchase at Sephora
Poorly blended eyeshadow
If I have to choose, I’ll say that this is the least offensive aspect of my middle school makeup tutorial, though it is by no means “looking good.”
I stuck with one color back then, mainly because I didn’t have time in the morning to finish my homework and apply complicated makeup. It was probably better this way.
Now, I have nothing against one shadow looks. They look fantastic when done right, but unfortunately, this isn’t one of those times.
When doing a one shadow look, the key is to blend the color upward into the crease, as if you were working with two colors. Just because you don’t have a separate crease color, it doesn’t mean no color in the crease. What I have going on here is just an incomplete look.
Don’t be like 8th grade me- Use this! >> Physicians Formula Matte Eyeshadow Quad in Classic Nudes
Eyeshadow only on top eyelid
While we’re talking about eyeshadow placement, let’s talk about the lower lid. Eyeshadow belongs there too! Mirror whatever you have happening on your top lids on the bottom lids as well. This way, the look appears balanced and not top heavy.
Harsh, un-smudged eyeliner
I suppose the saving grace for the lack of lower lid shadow is the fact that the heavy black liner balances it out, not that it should be an excuse. Honestly, it looks horrendous.
I think we’ve all gone through the heavy black rimmed eye phase, and for me, it lasted much too long.
Moral of the story- smudge your eyeliner. If you like black rimmed eyes, then great. Apply your black liner per usual, but instead of leaving it looking like a Sharpie marker attacked your eyeballs, just smudge it a bit with a small brush. Some liners even come with a built-in smudger on the end, which is super convenient.
Seriously, it’ll transform the liner from looking like a Sharpie attack to a sexy smoky eye.
Don’t be like 8th grade me- Use this! >> Marc Jacobs Highliner in Blacquer
Waterproof mascara all the time
My middle school makeup tutorial gets everything about the eyes wrong. Even down to the mascara of choice. It’s quite embarrassing.
Why I only wore waterproof mascara is beyond me. I wasn’t going swimming or anything, so it provided no true benefit.
It did, however, encourage clumpliness, flakes falling onto my cheeks, and plenty of lost lashes as I tried to scrape it off every night.
Apparently I didn’t believe in makeup remover either. Oh, the things we learn.
Don’t be like 8th grade me- Use this! >> L’Oréal Voluminous Original Mascara
Eyebrows? What are those?
I have very little recollection of my eyebrows back when this “middle school make tutorial” reigned as my “everyday makeup look.” Probably because I just didn’t give a crap about them. I plucked them every once in a while, but I didn’t know filling and shaping them was a thing. If I felt lazy, (or pain intolerant,) those buggers remained bushy for weeks on end. If I felt like plucking them, let’s just say they lost quite a bit of weight. Neither were good looks.
These days, shaping my brows is the one step I refuse to leave home without completing. Your brows really do frame your face, and they can mean the difference between looking well groomed, or well, un-groomed. If you take only one lesson from my middle school makeup mishaps, let it be to not neglect your brows!
Don’t be like 8th grade me- Use this! >> Sephora Retractable Waterproof Brow Pencil
*Note- I’m got a full brow tutorial, along with my brow’s personal life story coming soon. Everything from how I groom, fill, define, and maintain my brows. Look out for that! UPDATE: My brow post is live! Check it out right here >> Simple Eyebrow Tutorial + My strange eyebrow saga
Too sparkly lip gloss
Perhaps I thought a lip product with actual color in it would be too much for school? I don’t know. But somehow I figured the glitter-bomb gloss I chose instead fit the bill.
There is a time and a place for sparkly lips, and the everyday color-free school look isn’t it.
First of all, the sparkles provide no definition, and isn’t that why we wear lip products in the first place? Second of all, the sparkles all over kind of made me look like a toddler from the 90’s. I mean, I know I’m from the 90’s, but I don’t really want to go back there…
For an everyday look, a light, sheer tint looks much better. It gives your lips a little boost of color so they come out of hiding, but it doesn’t look like too much.
As for the shimmer, that one is best saved as topper for special occasions. Apply a small dab to the center of you lips over a bold color. It’ll stand out in a good way.
Don’t be like 8th grade me- Use this! >> Revlon Lip Lacquer in Garnet
All the wrong brushes
Brushes just weren’t on my radar for the longest time.
I applied my mineral foundation with a blush brush. I applied my eyeshadow with whatever.
The right brushes are super important for achieving a good look.
There are plenty of resources out there on the inter webs explaining all sorts of brushes.But to make things even more convenient, I’m also working on my own brush guide! It’s coming soon too. UPDATE: It’s here! Head over to my complete beginner’s brush guide now >> The Ultimate Beginner Makeup Brushes How-To Guide
Don’t be like 8th grade me- Use these! >> E.l.f. Brush Single Brushes Collection
So what’s the takeaway?
I made just about every mistake there is to make when I was first learning about makeup. And when I was learning, great online resources to help me out just didn’t exist.
Now that I have it all (well, most of it,) figured out, I hope my escapades will be helpful for you so you can avoid the awkward stage I went through.
It’s a long way of saying to learn from my mistakes, but that’s really what I mean.
I hope these mistake/tips from my ahem, interesting middle school makeup tutorial help you look better and feel better.
That’s all for today!
Like my middle school makeup tutorial? You’ll probably find this one helpful too >> How To Build Your Personalized Makeup Starter Kit
If you find this post interesting, informative, or just plain entertaining, tell me about it in the comments below. And don’t forget, sharing is caring. Share this post!
Till next time. ♥︎
Sign up for my free monthly e-journal, The Millennial Maven Love Letters for exclusive content + millennial inspiration and lifestyle hacks. Plus get instant access to my library of on-the-go style downloads!
FTC- Not sponsored by any brands mentioned. I purchase all products myself. All opinions are my own. Some links may be affiliated.
Hahahaha! YESSS this is such a great post! I DEFINITELY have to do one of these posts in the near future!!
thesixthdisneyprincess.blogspot.com
Hey Jasmine! Yes, you should totally do it. It was really fun. We take ourselves so seriously sometimes that it’s good to let loose a little. Thanks so much for reading! xo